Monday, December 31, 2012

How to apply false eyelashes


    1. You have several options when it comes to false lashes: A full set of false lashes or small clusters of individual lashes. If you buy a full set you can cut them into individual lashes.
  1. A full set will create lush, thick lashes, whereas individual lashes fill out your own sparse ones. No need to spend a lot of money on false lashes, you can get great ones in the drugstore beauty aisle and use them a couple times before throwing away.
    Shop for false eyelashes online.
  2. If the lashes you bought are too long, you can trim them by cutting them at an angle. Make sure to cut each individual lash at a different length so they look more natural. Always reserve the longest clusters for the outside corners of your eyes.
  3. To prep for the application, make sure your eyelid and lashes are clean of any makeup. Curl your real lashes with an eyelash curler. You can warm the curler under a blow dryer for about 3 seconds. Just make sure the metal isn't too hot for your eye.
  4. Apply a liquid or pencil eyeliner to eyes to conceal the lash roots.
  5. If you are applying individual lashes, put a few drops of lash glue on a hard surface. Let it dry for a minute until it becomes tacky. Use a set of tweezers to pick up eyelashes and dip the root in the adhesive.
    If you are using a full set, apply a thin strip of glue along the base of the lashes using a toothpick or a super fine makeup brush. Avoid applying the glue with your fingers because it gets messy fast. Wait a few seconds for the glue to dry a bit.
  6. If applying individual lashes, start at the outer corner of the eyes. Take the tweezers and wedge the glued lash into your natural lashes. Hold it in place for a few seconds so it dries in place. Stay as close to the root of your real lashes as possible. You'll want a couple clusters at the outer corner of the eye and one in the center of the eye or wherever your real lashes are sparse. Make sure to leave a natural space between lashes.
    The secret is to keep the clusters to five or fewer and stay away from the inside of the eye.
  7. If applying a strip, use your fingers to hold the lashes and apply on the lid as close to the roots as possible from the outer corner of the eye in. If you notice the lashes are too long, take them off and trim them.
  8. Use a Q-tip to press lashes in place.
  9. Once the false eyelashes are applied, let them dry for a couple minutes.
    Now you can do your eye makeup. You can create a cat eye by lining the upper lashes with a black liquid liner, drawing a wing at the outer corner of the eye and then working back from the outside in.
    For a less dramatic look, apply a dark eyeshadow along the upper lash line. This camouflages the false lashes.
  10. Apply mascara to lashes to blend them in with your real ones.

Tips:

  1. Tip: Just as you should throw away the little makeup sponges that come with eyeshadow, some experts suggest tossing the white glue that comes with false eyelashes. Instead, opt for dark eyelash adhesive, which is usually sold separately at drugstores, usually for about $5 or $6. (Check out your options here).
  2. To remove false eyelashes, use an eye makeup remover like Lancome's famous Bi-Facil(shown here), applying with your fingers. Massage in the makeup remover. Your false eyelashes should slip right off. You can also try water to loosen the glue.

What You Need

  • A full set or individual lashes
  • Eyelash adhesive
  • Tweezers
Eyelash Treatment
false-eyelashes

Love for Eyeshadow


A girl can never have to much eyeshadow! 


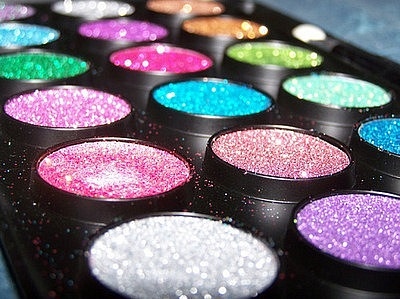
Make-up colorful eyeshadow palette with makeup brushes on it Stock Photo - 10588355Makeup set. Professional multicolor eyeshadow palette Stock Photo - 9188100Makeup Palettescosmetics, fashion, glitter, make up, makeup, makeup palette

Thursday, December 20, 2012

Hair and Makeup By KLynn


Hair and Makeup By KLynn
I offer services from:
Women and Men's Haircuts
Color, Hi-Lites
Extensions
Special Occasion Styles
MAKEUP for: 
Events
Parties
Special Occasions
Photo Shoots and MORE
SPRAY TANNING:
In home and on location
Organic Products
Color designed specifically for YOU! 

Visit my on FACEBOOK at: 

EMAIL ME AT: Hairchic084@gmail.com


Professional Spray Tanning by KLynn

Spray Tanning is a healthy and safe way to get a perfect tan without harmful rays!!
I use ORGANIC Products, I use a professional spray tanning system and I do everything by HAND! No spray tanning booth! Enjoy getting your tan in a very comfortable and professional environment!! You can come to me or I can come to you...PERFECT for special occasions, vacations, parties, events and MORE! :) I go by your own skin tone and what color tan your are looking for, SPECIALLY designed for YOU!!!  
EMAIL ME FOR MORE DETAILS or VISIT ME ON FACEBOOK!!


Monday, December 17, 2012

Holiday Makeup

THE HOLIDAYS ARE HERE!! A MUST is holiday makeup that looks fabulous! A lot of trends this year for 


the holiday season....Reds, Golds, Silvers and MORE! Here are some of my FAVORITES :) 


Holiday Hair

The holidays are here!!! Lots of parties, events, family gatherings....HOLIDAY HAIR is a must :) Here are some of my favorite styles that are HOT this holiday season :)


Thursday, December 13, 2012

The Famous SMOKEY EYE


The FAMOUS SMOKEY EYE.....So easy to do with the right colors, tools, and products! You can have a 


smokey eye with BROWNS or BLACKS. You can use glitter if you like or a little sparkle!  


Wednesday, December 12, 2012

The new bang! yay or nay?


These bangs are amazing! Ever thought about trying 


something new? Don't be afraid ladies......these bangs are 


SUPER HOT and deff. a new TREND!!! DONT CUT THEM 


YOURSELF! Go see a professional :) I had them 


before and am actually thinking about cutting mine again :)


HAVE FUN AND ENJOY YOUR NEW BANGS :) 


Mascara that won't drain your wallet and are AMAZING!!

Cover Girl: Volume Exact: Every time I wear this, as I’ve written before, everyone asks me what mascara I use. It separates and lengthens. It’s beautiful. NO clumps either. Awesome and definitely works even better than many designer brands that go for $25+.
Cover Girl: Lash Blast Volume Blast: This really darkened, thickened and separated. Loved this. Definitely worth the money and didn’t seem to dry out over night like many other brands. This maybe even stayed a little moister than the Volume Exact for a few days longer.
Maybelline: Great Lash Mascara. Allure may give this baby rave reviews but we weren’t that impressed. We found at the beginning it was okay but seriously a few weeks later it was so dried out. Bottom line it’s not such a bargain. You get what you pay for with this.
Cover Girl: Professional Mascara-Curved Brush: All I have to say is NO. Just don’t even bother. Yes, you can get it for $4.79 at Drugstore.com but don’t bother. I don’t know why I even tried the curved brush. It sucked and made my lashes clumpy.
Cover Girl: Lash Exact: So I thought due to the small brush that it’d be precise but it was no magic wand. Skip this too.
Maybelline: Colossal Lash Mascara: So Margaux had written about this saying she loved it but we can’t agree. The brush was too big or something, but not in a good way, it was hard to catch the lashes without scraping your brow with the wand.

New Year's Eve Makeup Ideas for 2012


New Year's Eve Celebrity Eye Makeup Ideas!! They are all amazing and so easy to do! 

Brown Smokey Eyes


Ivory Eyes and Orange Lips Makeup


Golden Makeup Style

Find your face shape!

There Are Six Basic Face Shapes
 
Oval
Face Shape
Round
Face Shape
Long
Face Shape
Square
Face Shape
Heart
Face Shape
Diamond
Face Shape

Find Your Face Shape
Start by pulling your hair back from your face, and with no makeup on, look closely in the mirror.
The features for each shape to look for are:
 
Oval Face Shape
Round Face Shape
Long Face Shape
  • forehead is wider than the chin
  • prominent cheekbones
  • face gracefully tapers to a narrow oval chin
  • face is almost as wide as it is long
  • face is widest at the cheeks
  • forehead, cheekbones and jawline are all about the same width
  • can tend to have a prominent chin
  • has an elongated appearance
 
Square Face Shape
Heart Face Shape
Diamond Face Shape
  • forehead, cheekbones and jawline all about the same width
  • squared jawline is the most obvious feature
  • similar to oval but the chin tapers to a point.
  • not as common as the other face shapes
  • typically the face is highly angular
  • the forehead is somewhat short
  • the face is widest at the temples

Still not sure? - A simple test

  • Measure the length of your face with a ruler. (In this case the total length of the face is 8).
  • Divide the total length by 3. (In this case 8 divided by 3 is 2.67 or 2 2/3).
  • Measure the length from the bottom of your nose to the bottom of your chin. (in this case 2 1/3),
  • If the last number (the 2 1/3 number) is larger than the first number (the 2 2/3) than chances are you have a long face. 
  • If the last number is less than the first number than chances are you have a round face.
  • If the last number is equal to the first number than chances are you have an oval face

Makeup Face Charts...Just some ideas!


Tuesday, December 11, 2012

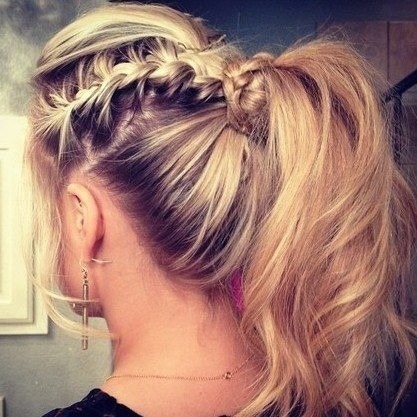
The low down on the MESSY PONYTAIL

Here is how you get this lovely creation that men just die 


over :) 


Messy Ponytail for Straight Hair

  • If you have naturally straight hair, you know that it's difficult to get texture, which is absolutely essential for the messy ponytail. If you want texture throughout your head and pony tail, it's best to use a curling iron to create loose waves. A smaller barrel curling iron will create more texture, while a larger barrel will create less. The same rule applies for size in the sections of hair you use.  Dry your hair, or flip your head upside down with a blow dryer to create as much volume/texture as you can before you begin. Take a piece of hair and wrap it around your curling iron. There is no need to clamp it in, simply wrapping the piece around the barrel will give a nice, loose wave. Once you have done this throughout your hair, feel free to use a light hairspray. Gather it loosely together toward the nape of the neck and secure it with an elastic. It needs to be loose initially because the next step is to split the tail in two, one part in each hand, and pull them in opposite directions. This will tighten the elastic close to the scalp, create volume, and give hair its messy chic look. The key here is not to fuss with it too much, although you can pull some pieces out, or loose, to give it a windblown look. Experiment with it, as every hair type is different, based on its thickness and own texture. Once you have your method perfected, this will be a no muss, no fuss way to add some edge and casual flair to your appearance.

Messy Ponytail for Wavy/Curly Hair

  • If your hair is wavy or curly, you are already half way to the messy ponytail. Because you don't have to artificially create texture, an easy way to prepare for this is by securing damp hair in a bun, either at the nape of the neck, or at the top of the head. Once hair is dry (or nearly dry) you can let down the bun and use the resulting waves to create the ponytail. You can put hair in the elastic as is, or you can go a step further, using a "messy spray" at the roots to create a disheveled volume. Many drug stores and salons sell spray that is designed to create texture. These sprays will say on the label what they are for and many times are liquid wax sprayed in a fine mist over roots. Once you run your fingers through in a zig-zag pattern, you'll have the perfect look.